

It is easy to create YouTube videos, but it takes a long time to do good narrations. A lot of creators have trouble with the inability to make clear voice-overs and maintain them throughout the videos.


The problem is resolved by using Text to Speech AI on CapCut PC and enabling narration to be quick and simple. Use automated voiceovers to maintain the quality of sound, consistency, and professionalism of your audio per video.
Video editors today also comprise text-to-speech artificial intelligence tools, allowing makers to convert their scripts into voice-overs with only the touch of a few clicks, saving them hours of work.
YouTube Videos Text-to-Speech AI
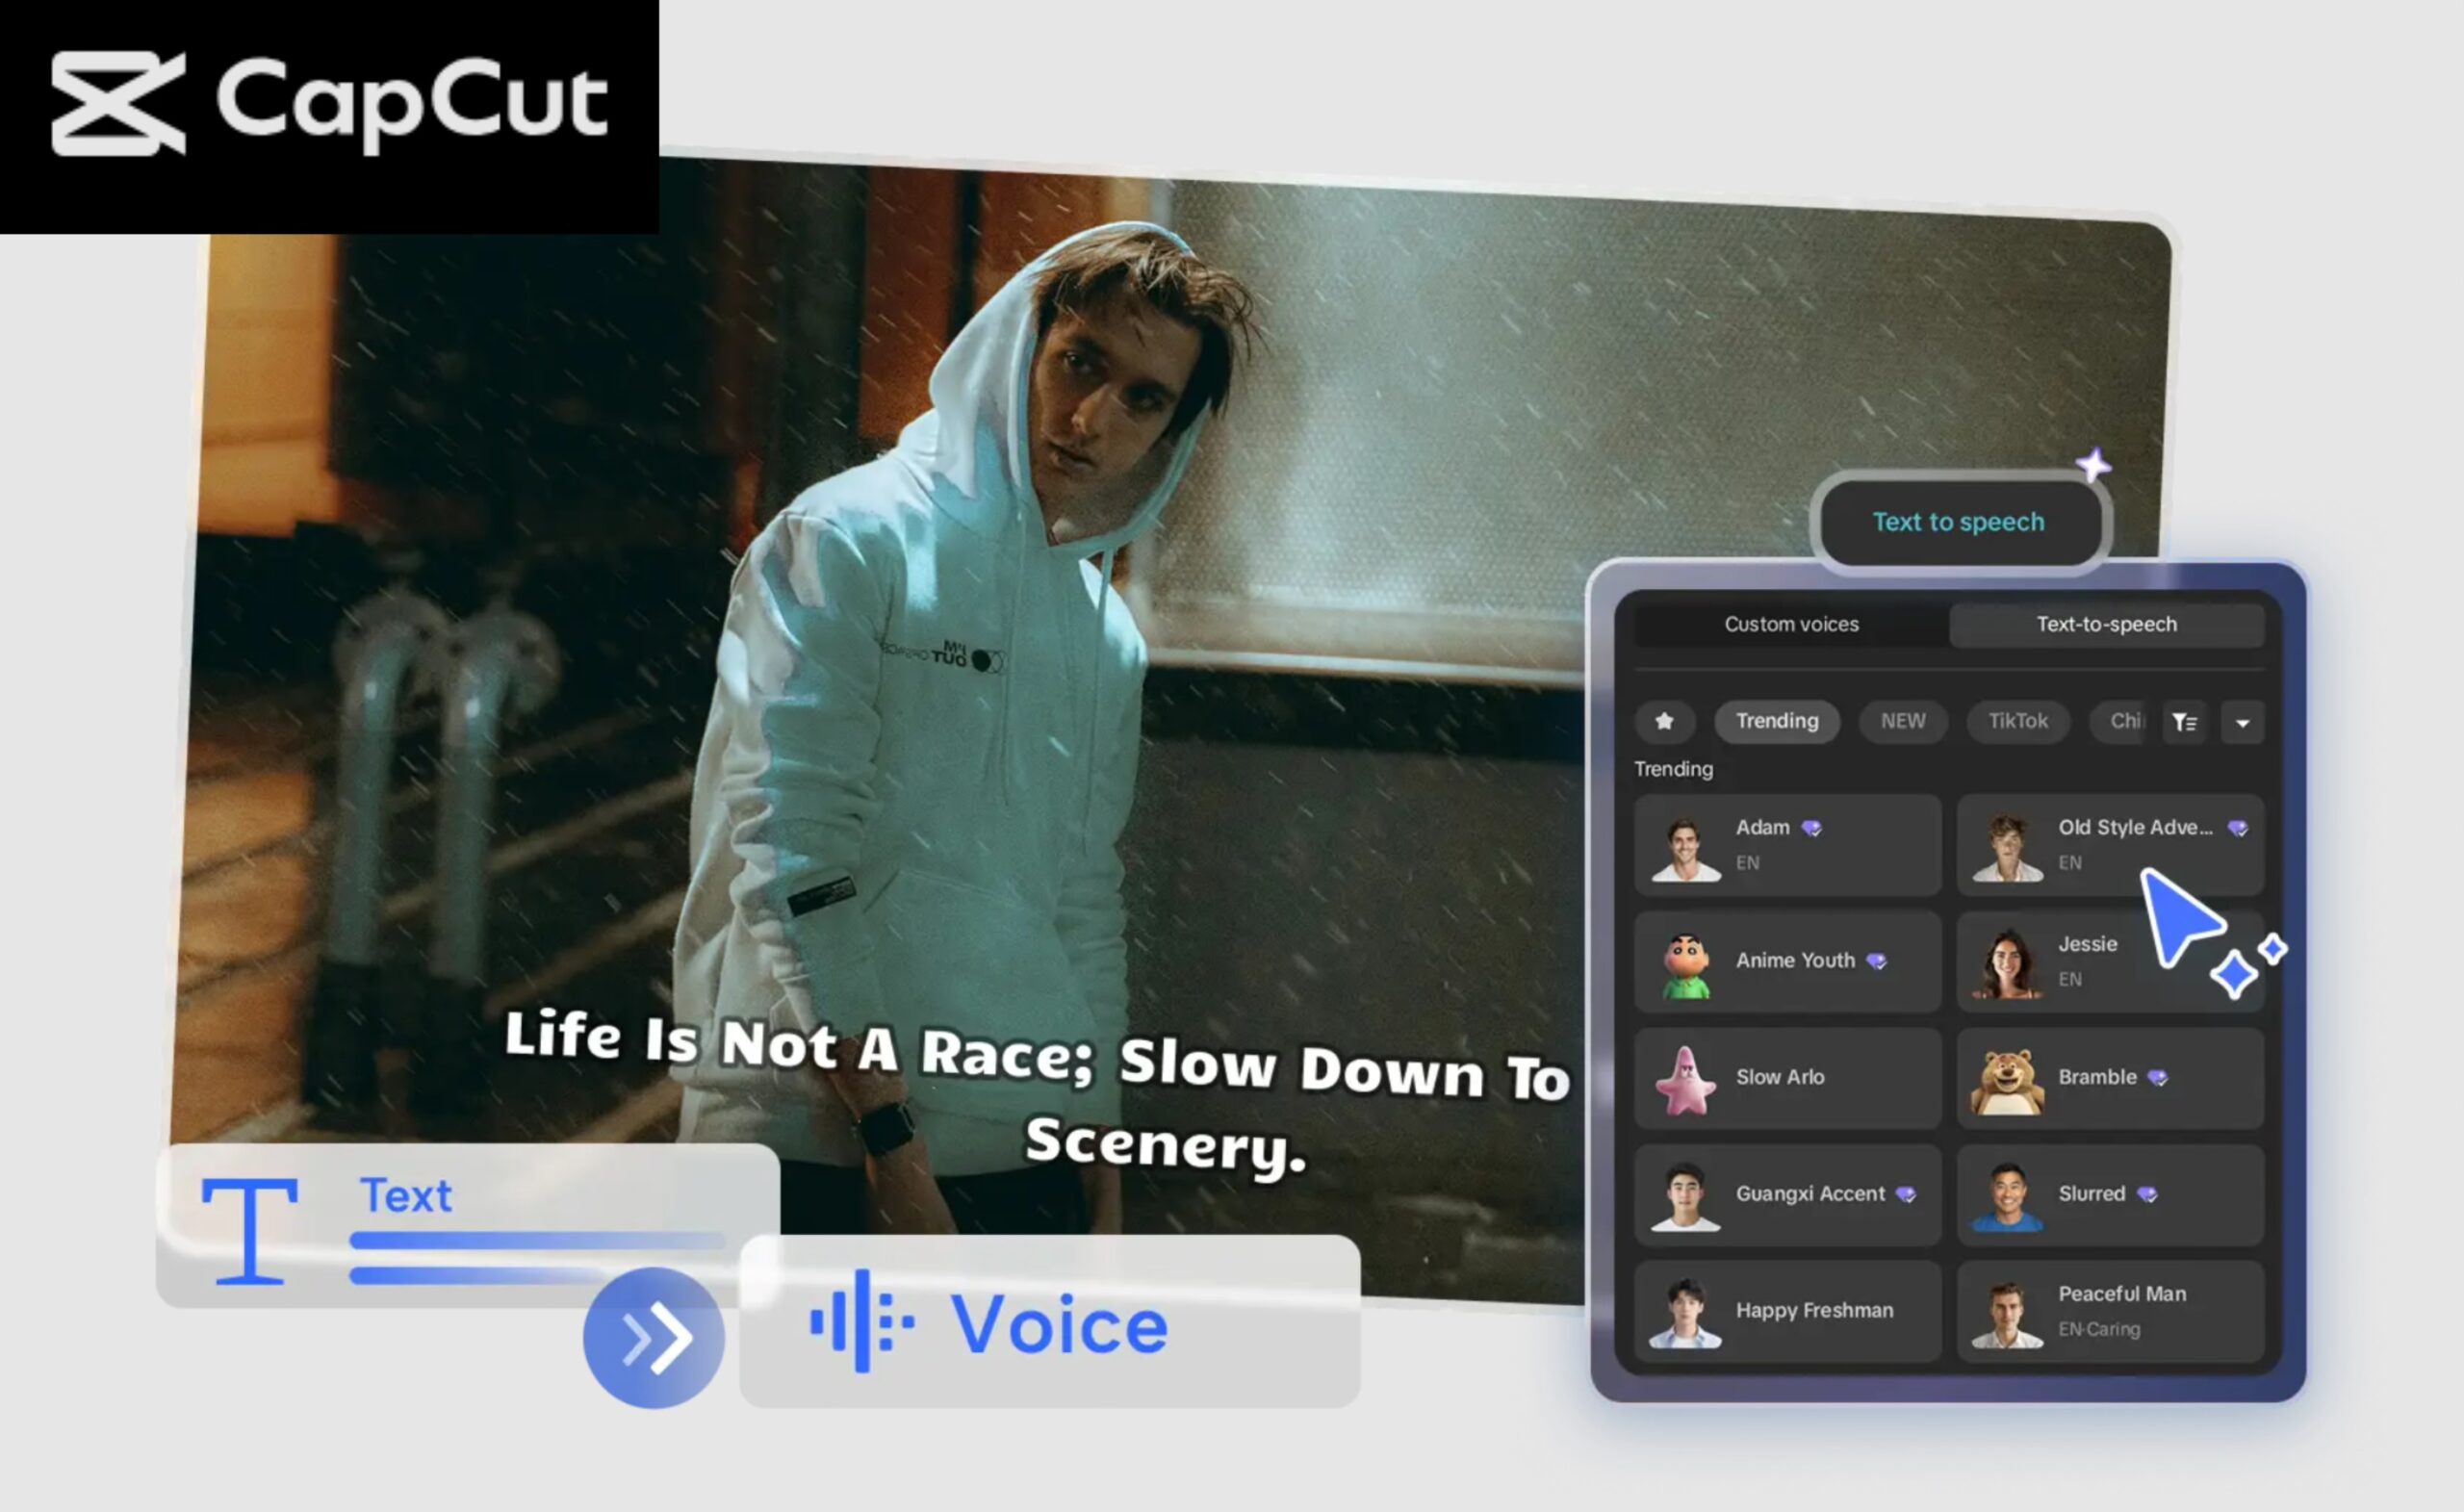
Text-to-Speech (TTS) AI alters the method by which YouTubers make voiceovers. You do not necessarily have to record your voice; you can just type your script and have CapCut Desktop Video Editor read it out loud. This saves time and assists in maintaining a consistent narration throughout the videos.
There are also professional-sounding voices of TTS AI. You may choose a male or female voice, tone, and can even have little effects, according to your video style. It makes your videos look professional without hours of videotaping.
This is simplified by CapCut Desktop Video Editor. All you need to do is type your script, hit Text-to-Speech AI, and listen to your narration immediately. You are also able to adjust volume, fade in and out, and clean the audio in case of necessity.
Remember, CapCut PC is not completely free software. There are more advanced TTS features that might require a subscription.
Step 1: Install CapCut Desktop Video Editor
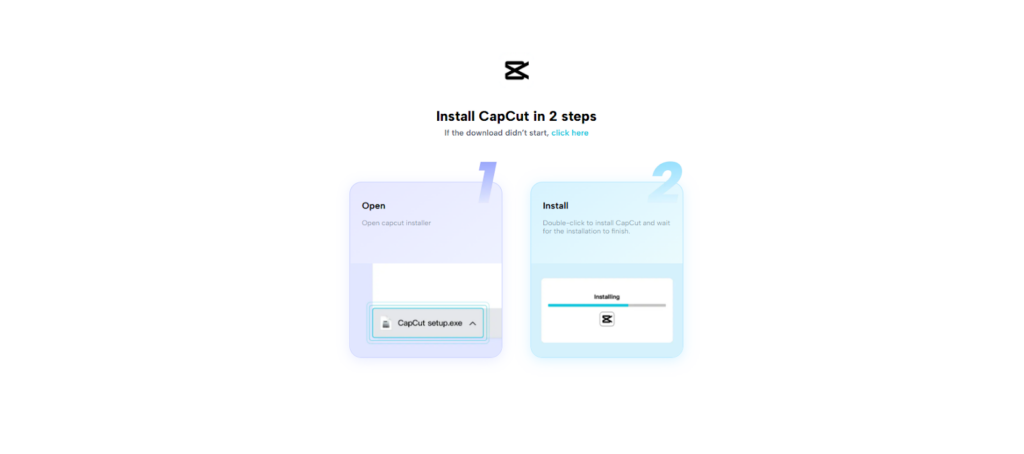
To start with, CapCut Desktop Video Editor should be downloaded from the official site. Ensure that your PC has the required minimum system requirements to operate AI, like AI Avatar, features without difficulties.
Open the file that has been downloaded and proceed through the instructions on the screen for Windows or macOS to install it. Install CapCut PC and make sure that it launches successfully.
Remember that not all of the more sophisticated functionalities, such as premium TTS, are free and can be purchased via a subscription. After this is installed, you are now ready to post your video or script to be narrated.
Step 2: Publish Your Video or Script
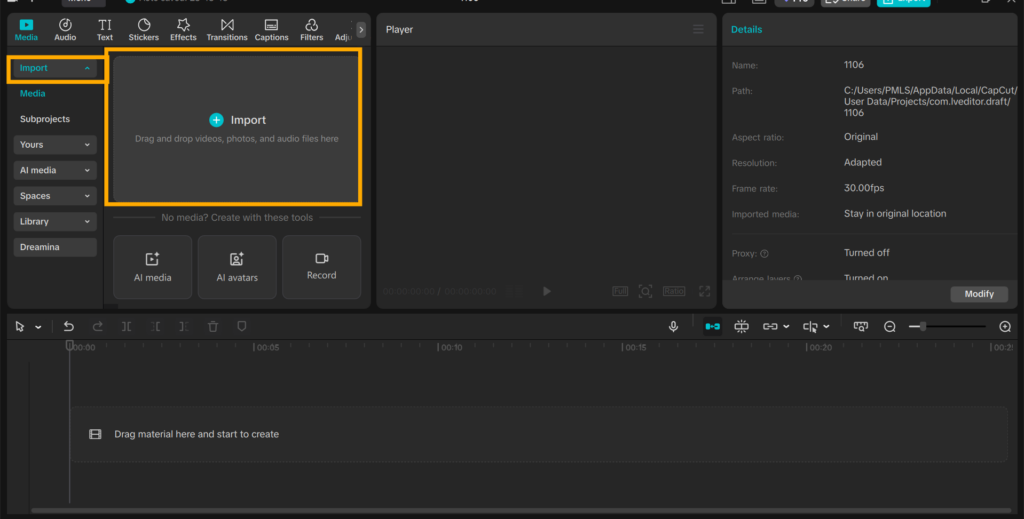
Install the open CapCut Desktop Video Editor and open a project. To upload a video, choose the Upload button and find the video on your computer, or create a clean canvas in the case of having a script only.
Arrange your clips or script text in such a way that it allows the addition of narration without any difficulties. Another thing that you can add is an avatar that is an AI, so that your video becomes more interesting and attractive to watch.
You can move or respond to actions as your TTS narration plays this avatar, making the video look generally better. This is done so that once you have recorded your automated narration, the visuals will properly match it to give the viewer an easy time watching.
Step 3: Convert Text to Speech
In your project, go to Text and then Default Text and write your narration script. Once you have typed your script, you can press Text-to-Speech, where AI voices can be created automatically. CapCut Desktop Video Editor also has a variety of voice options, such as male and female voices.
You are also able to change the tone of the language to suit your video style. Simple effects such as the fade-out and fade-in should be used to make the narration sound natural. You are also able to adjust the sound or even have a noise reduction so that you can hear clearly.
Your TTS audio and an AI avatar are a combination that would make your videos more active and involving. Avatar is able to keep pace with the narration, which makes viewers easier to track the content.
In this case, the step saves you time because you do not have to record your voice manually. Within minutes, you can create the best narration and directly make corrections in CapCut PC and achieve a professional effect.

Step 4: Revise and Improve Narration
Once you have created your TTS voiceover, cut its audio track with your video clips in CapCut Desktop Video Editor. Cut or relocate clips as necessary to fit in with the voiceover. Background music or sound effects can also be added to make the video interesting.
Modulate the number of each element to ensure that the narration is clear. Watch the entire video and ensure that the audio flows freely and nothing is not coming out of place.
All this can be done with CapCut PC, without the use of other software. The editor allows you to control the narration, visuals, and effects in a single place, and simplifies the process of work.
Step 5: Export & Share Your Video
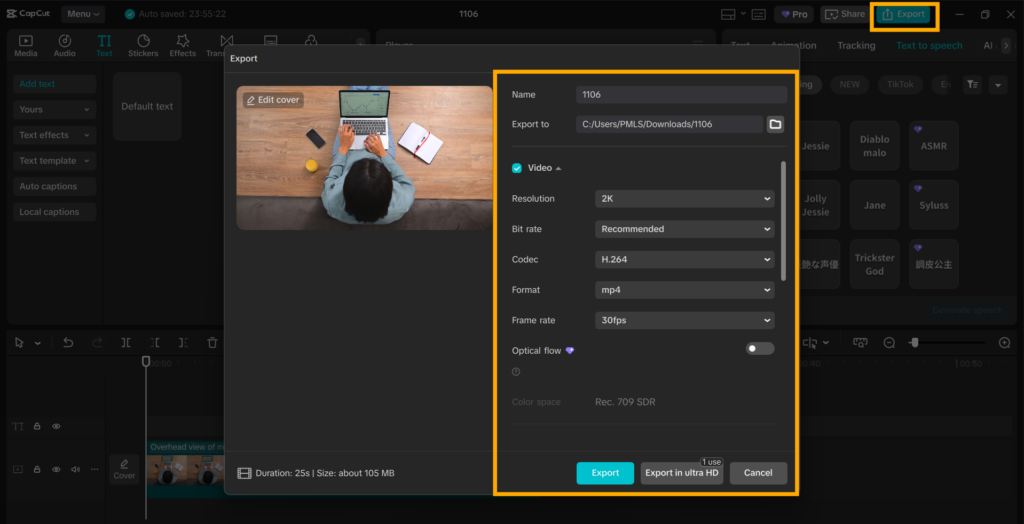
You have a ready video, and when you want to export it, go to the Export button in CapCut Desktop Video Editor. Establish the desired profile name, resolution, format, and quality.
You can save the video on your computer or post it directly on YouTube, TikTok, or any other social media after the export. This would keep your TTS presentation and visuals in step with one another, providing the audience with a professional presentation.
CapCut PC ensures that it is easy to export, but at the same time, your video remains crystal clear and publishable in just a few minutes.
Conclusion
YouTube narration is quick and professional with the help of CapCut Desktop Video Editor and a Text-to-Speech AI. You have the opportunity to save time, maintain your audio, and have more than one voice to fit your video. Your content is even more involved with the addition of AI avatar visuals.
Today, start creating your next video and use CapCut PC TTS AI, and you will quickly realize how simple it is to create high-quality narrative without having to record your own voice.


